For some reason, the homemade pasta has the magic to just make it all taste better and feel more springy, more colorful (if you are game for it), and more exciting because you know how you made it yourself. For instance, while purchased pasta can be cooked instantly by anyone, making your own dough will lead to a whole new world of tastes and satisfaction.
This guide will help you to become a confident pasta maker by providing basic knowledge and skills in this area. We shall reflect on key ingredients, outline a step-by-step process of pasta production, and give some pieces of advice on overcoming certain difficulties.
Ingredients for Perfect Pasta Dough: Understand the Building Blocks
Every masterpiece, whether it is culinary or a dough for homemade pasta, depends on good foundations. Let us consider these main actors:
A. Flour: The Foundation
- Types of Flour: But why stick to ordinary white flour?
- Semolina Flour: It is rougher than other flours with more gluten, hence its noodles are slightly coarser; great for tagliatelle or fettuccine.
- Bread Flour: Hence, bread flour produces more chewable pasta because it contains more protein, making it perfect for pappardelle or lasagna noodles, which are thicker.
- Whole Wheat Flour: A little fiber! Replace some all-purpose flour with whole wheat ones; just bear in mind that whole wheat absorbs more water than fine ones, so adjust the amount while cooking accordingly.
- The Importance of Choosing the Right Flour: Which kinds should you use depending on what your final dish should taste like?
B. Eggs: The Binding Agent
- The Role of Eggs: On one hand, eggs give flavor richness as well as pliability to the dough while acting as binding agents for other ingredients in turn.
- Alternatives for Egg-Free Pasta Dough: Are there vegans among us? Or maybe someone suffers from an egg allergy? No problem! You can make pasta yourself; a flaxseed meal mixed with water or a commercial egg replacer also works as an egg substitute.
C. Salt: The Flavor Enhancer
- Function of Salt: Despite its seeming insignificance, salt is a significant constituent that adds taste to your pasta dough and toughens the gluten network to improve texture.
- Recommended Types and Amounts: Go for fine sea salt or kosher salt. The rule of thumb is 1 teaspoonful salt per 1 ½ cups flour.
From Flour to Perfection: A Step-by-Step Guide
Having learned what goes into it now, let’s get hands-on with some pasta magic!
A. Mixing the Ingredients:
- Combining Flour and Salt: Make a well at the center of your heap of flour on a clean working table, then sprinkle some salt, gently mixing with a fork until uniformly mixed up.
- Incorporating Eggs: Drop eggs (or any alternative egg substitute) in the well, gradually whisking it together with a fork while taking flour around till you have a crumbly dough mixture.
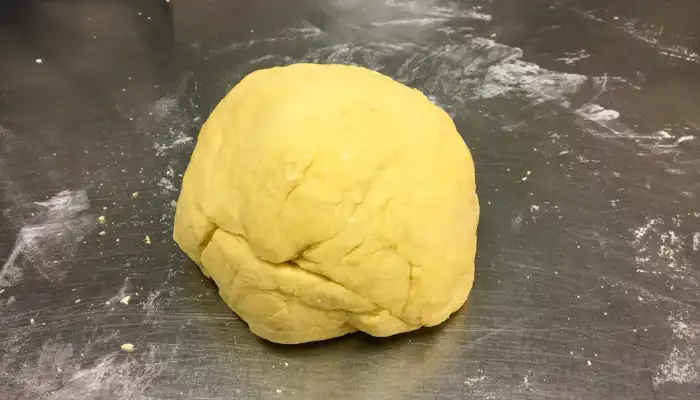
B. Kneading the Dough:
- Importance of Kneading: Gluten will form within its grains after kneading, therefore creating a smooth, elastic dough that holds shape after cooking (O’Donnell).
- The desired consistency can be achieved through kneading for about 8–10 minutes. By now, you may notice that the mixture has been lumpy and crumby, but do not surrender; during further manipulation, it will become smoother and more elastic.
Effective Kneading Techniques: There are two main techniques:
- On a lightly floured surface: With your palm’s heel, push the dough away from you, then fold it back on itself. Do this repeatedly for a few minutes.
- Using a stand mixer: Put it in your stand mixer fitted with a dough hook attachment and turn it on at low speed so as not to overdo the dough.
C. Resting the Dough:
- Purpose of Resting: The aim of relaxing gluten is to avoid it falling apart when rolled out later.
- Ideal Resting Time and Conditions: For a minimum of half an hour or more, cover tightly with plastic wrap and leave at room temperature.
D. Rolling and Shaping: Using a Pasta Machine or Rolling Pin
Pasta Machine: This tool ensures that every time you roll, your dough will have the same thickness, hence making your job easier. How to use the pasta machine:
- Divide the Dough: Take your rested dough and cut into manageable portions.
- Set the Machine: When using them, allow rollers to be adjusted to their widest points. Fold the dough in half; repeating this process several times increases elasticity. Feed a piece of dough through the rollers while turning the handle.
- Gradually Reduce Thickness: Keep running through with another piece of dough each time after adjusting down on the thinning setting until reaching about 1/16 inch thick pieces (a little thicker for lasagna noodles).
- Shaping Your Masterpiece: Once you have reached your preferred thickness, change the machine’s setting to cutting and simply start turning its handle to make pasta of that kind. Some popular shapes if you are using a separate ravioli attachment include fettuccine, spaghetti, tagliatelle, and ravioli.
Rolling Pin: As much as a pasta machine is useful, it is still possible to make tasty homemade pasta using an old-fashioned rolling pin.
- Lightly Flour Your Surface: For the prevention of sticking, generously sprinkle flour on your working surface.
- Roll Out the Dough: Start from the center outwards while applying even pressure with a rolling pin placed on some portion of dough on a floured surface. Occasionally turn over the dough to have equal thicknesses, aimed at getting a sheet as thin as about an eighth (1/16) of an inch or so.
- Cutting Your Shapes: Cut the pasta sheet into desired shapes using a sharp knife. These may also be fettuccine, spaghetti, or tagliatelle in common usage. Meanwhile, fun shapes can be created with cookie cutters.
Tips:
- When either dry or cracking after rolling out, do not hesitate to sprinkle a little water and knead again for some time.
- On the other hand, if sticky dust, slightly more flour but not too much will yield tough dough.
E. Cooking and Storing:
Cooking Fresh Pasta:
It takes less time to cook fresh pasta than dried; therefore, in a large pot, put salted water to a boil until it bubbles, then add the fresh pasta into the boiling water for just one to three minutes, or when it is al dente (cooked but firm).
Tips on How to Store Homemade Pasta Dough
- Fresh Pasta: Fresh egg pasta can sit at room temperature for two hours. It should be covered with a damp towel so that it does not dry out.
- Refrigerated Dough: If you want the dough to stay longer before usage, wrap it tightly in cling film and refrigerate for up to 48 hours.
- Frozen Dough: To freeze this dough, tightly wrap it with plastic wrap and place it in freezer-safe containers or bags; then keep it frozen for about three months. But remember that they must thaw overnight in your fridge before you want to use them.
With some practice and following these few steps, soon enough, you’ll become a home pasta pro! Yes? Then let’s gather ingredients together and dive into homemade pasta’s magical world!
Troubleshooting Common Issues
Even experienced people sometimes have trouble making pasta. Here are some common problems that could occur:
A. Sticky Dough:
- Possible Reasons: The dough might contain excess water, or there may be high humidity levels in your kitchen.
- Solutions: Add flour one tablespoon at a time until your mixture becomes manageable by kneading; don’t add too much as it will harden your pasta.
B. Dry or Crumbly Dough:
- Causes: This could arise from low water content or using wheat flour, which absorbs more liquid.
- Techniques for Salvage: Knead with additional teaspoonfuls of water until the mix pulls together after every addition.
C. Tough or Chewy Pasta:
- Reasons: Over-kneading creates hard pasta, while too much flour makes it chewy.
- Methods to Prevent and Soften: Be careful not to over-knead your dough; don’t go beyond 8–10 minutes. If the pasta feels crisp after cooking, put some olive oil or butter into the serving dish to soften it a bit.
Conclusion
Making pasta dough at home is a fulfilling way to be creative. This enables you to manage ingredients, experiment with different flavors, and have a meal that talks only about you. So, let’s get our flour, eggs, and sprinkle of imagination for more pro-pasta! You may create chaos in your kitchen as long as food preparation remains your favorite activity, mixed with happiness.